

|
Joined:
|
12/02/2011 |
|---|---|
|
Last Updated:
|
13/02/2011 |
|
Location:
|
Finland |
|
Climate Zone:
|
Cold Temperate |
|
Gender:
|
Female |
|
Web site:
|
pohjoinenpermakulttuuri.wordpress.com |
(projects i'm involved in)
(projects i'm following)
Back to Mari Korhonen's profile
Posted by Mari Korhonen over 13 years ago
It's always a delight to find ways to bypass the industrial food system and discover real, fresh and clean food right where you live, from people you know. It's one of the keystones of local resiliency and food security, as well as an important economical link on a local level, regardless of having the medium of exchange be conventional monetary units, goose eggs or sourdough bread for example.
So, when you get from your neighbor the ten liter jug of milk so fresh that it's still warm, and it doesn't even fit into the fridge as it is - what to do? Well, I was fortunate to have an opportunity to help out a lady who knew how to make some very nice things from it!
Raw goat camembert, fresh cheese and milk for drinking - the process.
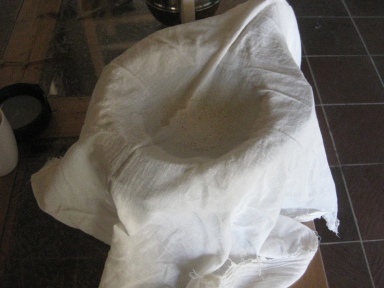
1) Filter the milk. During milking some particles and perhaps a hair or two end up into the milk. To get them out, use a regular sieve covered with a slightly moistened cheese cloth (to improve permeability) and pour the milk through into two big cooking pots, approximately half and half. From the first one you'll make the hard cheese, and the other one will become fresh cheese and milk for drinking.

2) If you live in an appropriate climatic zone, you can peel a branch of a fig tree to give a natural rennet effect for the (hard)cheese milk. For the hard cheese heat the milk on a stove into 35°C (95°F) and keep in that temperature for 45 min- 1 hour. For this you need a thermometer and some vigilance, to not have the temperature fluctuate too much during this time. The other milk in this case was pasteurised, heated into a temperature between 70 and 80°C (roughly 160-175°F) for ten minutes, and then quickly cooled. I don't know if this is necessary, but in the case of goat milk it prevents the emergence of a pretty strong "goat aroma" in the milk that would normally appear in a day or two and make it unpleasant to drink. And the milk keeps longer.

3) After 1 hour, add rennet into the milk for hard cheese and let it remain in the same temperature of 35°C (95°F) for another hour more or less. When the pasteurised milk has cooled down to 35°C as well, separate the drinking milk, and add some rennet to the remaining milk. Leave it to coagulate.

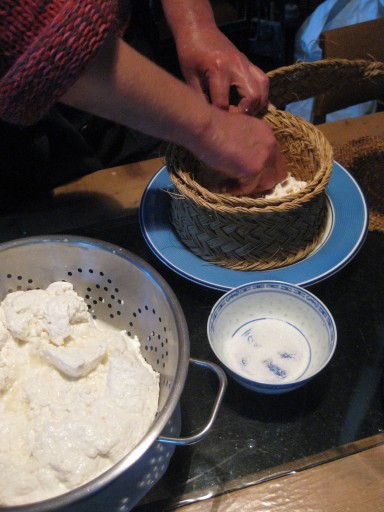
4) Once the hard cheese milk has coagulated into a kind of yoghurt consistency, break it into small crumbs for example using that nice branch of fig you have and let it separate from the whey for some time. Once that is done, it's time to collect the "dough" of cheese from the pot into a sieve so that the remaining whey can drain out. You can press the cheese mass with your fingers to get more whey out.

5) In layers, put some cheese and salt into a mold, pressing excess whey out as you go. I'm not sure how much milk there was exactly to begin with, but the amount of salt used was 30 grams. The mold used here was a traditional Andalucian belt-like design woven from a local fibrous grass.

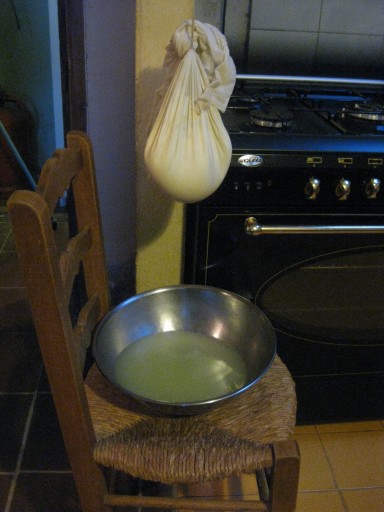
6) When the fresh cheese has coagulated, it's broken up into crumbs as well and captured into a cheese cloth. Make the cloth into a bag and hang it to drain somewhere, with a bowl under it where the whey can drip. After this you can put it into a bowl and it's ready for eating! Most delicious with some finely chopped fresh cilantro, parsley and garlic!

7) Cover the hard cheese in the mold with a same size piece of wood and place a weight over it to press it into a firm form. After some time stored this way and perhaps some steps that i'm not aware of it will be ready for eating! The whey remaining from all this can be used for making sourdough bread or pancakes.

Buen provecho!
You must be logged in to comment.


| Permaculture Design Course |
| Type: Permaculture Design Certificate (PDC) course |
| Teacher: Geoff Lawton |
| Location: The Channon, Australia |
| Date: Mar 2009 |

| Permaculture Internship 3 months |
| Type: Internship |
| Teacher: Geoff Lawton |
| Location: PRI Australia |
| Date: Apr 2009 |

| Permaculture earthworks course |
| Type: Earthworks |
| Teacher: Geoff Lawton |
| Location: Mulloon Creek Natural Farms, Bungendore, NSW, Australia |
| Date: Jun 2009 |

| Solar greenhouse design workshop |
| Type: Gardening |
| Teacher: Jerome Osentowski |
| Location: Central Rocky Mountain Permaculture Institute, Basalt, CO, USA |
| Date: May 2010 |

| Permaculture, solar greenhouse design and forest garden workshop |
| Type: Gardening |
| Teacher: Jerome Osentowski |
| Location: Koroinen, Turku, Finland |
| Date: Oct 2010 |

| Permaculture Trainer Course |
| Type: Teacher Training |
| Teacher: Rowe Morrow |
| Location: Austria |
| Date: Jul 2011 |

| RegenAG and keyline design |
| Type: Other |
| Teacher: Darren J. Doherty |
| Location: Vale da Lama, Portugal |
| Date: Nov 2011 |

| Holistic Management and Grazing Planning |
| Type: Other |
| Verifying teacher: Kirk Gadzia |
| Other Teachers: Tamara Gadzia |
| Location: La Donaira, Spain |
| Date: Apr 2012 |

| Mushroom Cultivation |
| Type: Other |
| Teacher: Will Borowski |
| Location: Sydney |
| Date: Sep 2012 |